Here are the other “how to guides” you might need to check-out in order to get your Gmail account connected with Press Jockey:
Gmail users: How you can turn on 2-step authentication for your email account
Gmail admin: How admins can setup 2-step authentication for your Gmail powered domain
Let’s connect your email to Press Jockey with an app password.
Connecting your email will require you’ve got 2-step authentication turned ON.
- You will need 2-step authentication turned ON for your account. If you haven’t done this already, here’s our step-by-step article to do that.
- IF you are trying to turn on 2-step authentication but cannot, this may be because your administrator has blocked 2-step authentication. Your administrator will need to turn ON 2-step authentication for your company, so that you can turn on your own 2-step authentication for your email. Agency owners, this is something you’ll have to do for your own company email. You can follow the steps to do so here.
- You will need to turn on an app password for Press Jockey
- You can then input that app password into your settings in Press Jockey, and your account will be connected
- Select the media platforms you want Press Jockey to monitor, and that’s it! You’re all setup!
To do this, we’ll need to add an extra layer of security to your email address. You will need to have 2-factor authentication turned ON.
Click here for the article on how to activate 2-factor authentication and make your account more secure.
Step 1: Open your account settings (in Gmail)
Click on the top right corner of your Gmail screen, where you see your initial(s). It looks like this:

Step 2: Click on “Manage your Google Account”
.

Step 3: Click on Security
.

Step 4: Click on 2-step verification
.
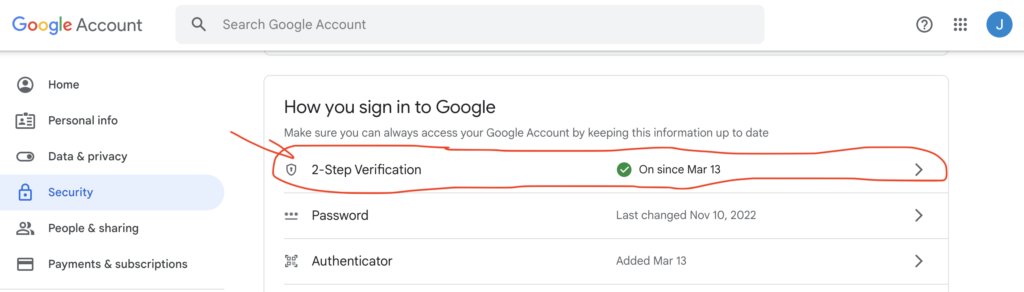
Please remember, you need to have 2-step authentication turned to “ON” before you can connect your account to Press Jockey. If you haven’t done that already, please click here to get the process started.
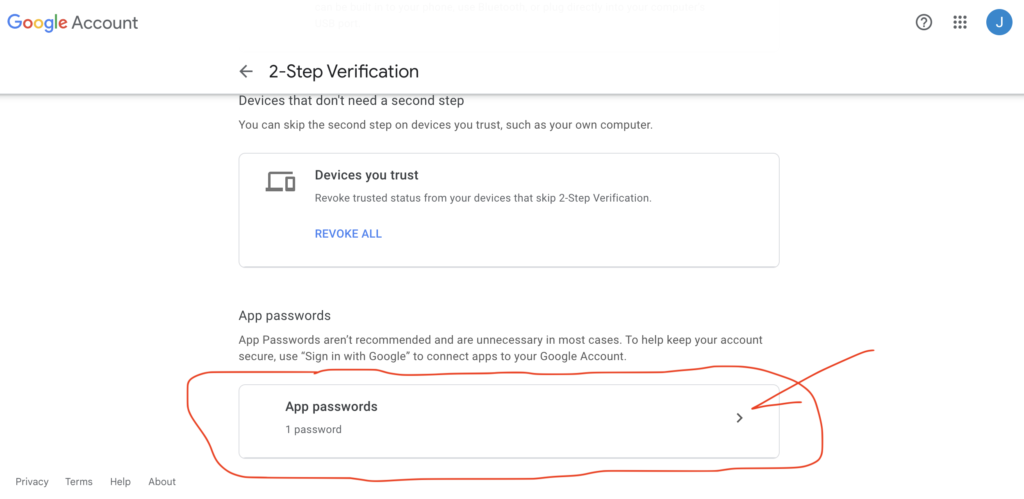
Step 5: Scroll down and click on App Passwords
.
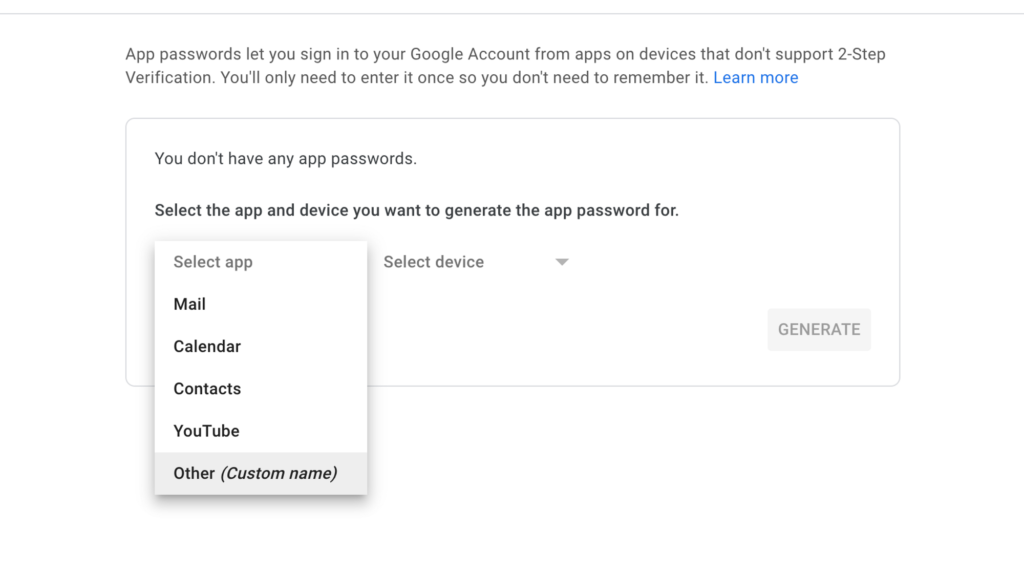
Step 6: Click on the dropdown that says “Select app”
.
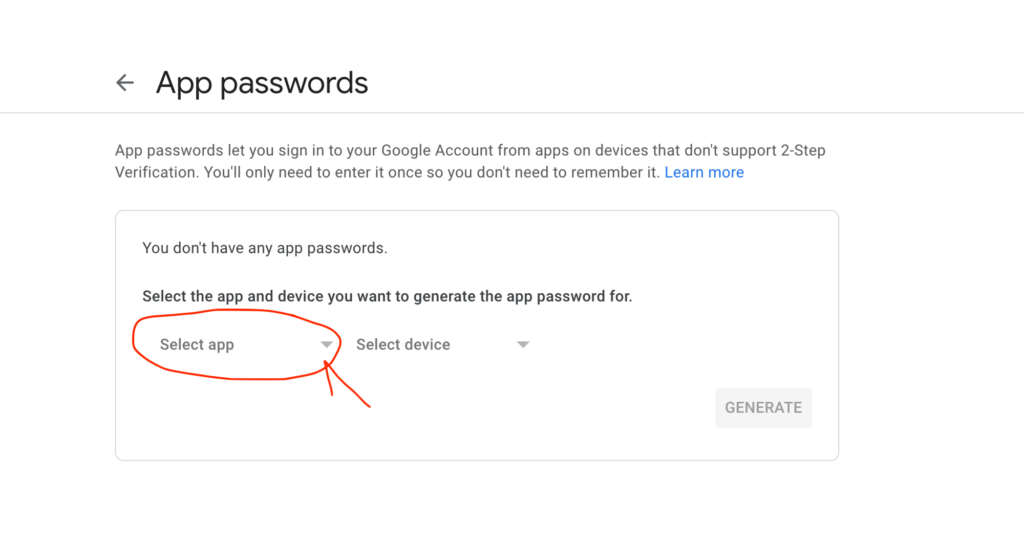
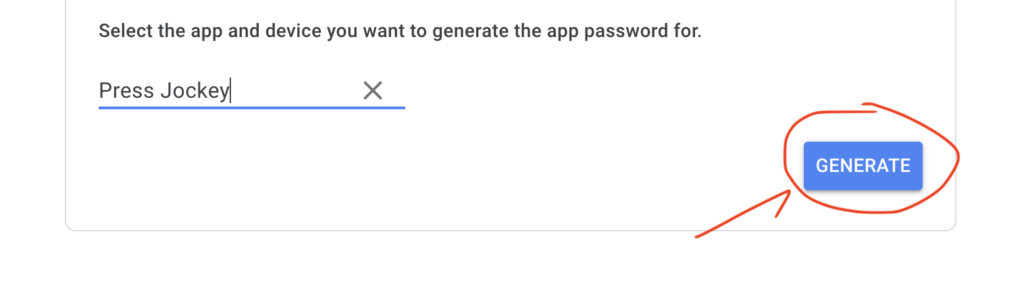
Step 7: Click on “Other (Custom name)” and type in Press Jockey
Click “Generate” to get your custom app password for Press Jockey.
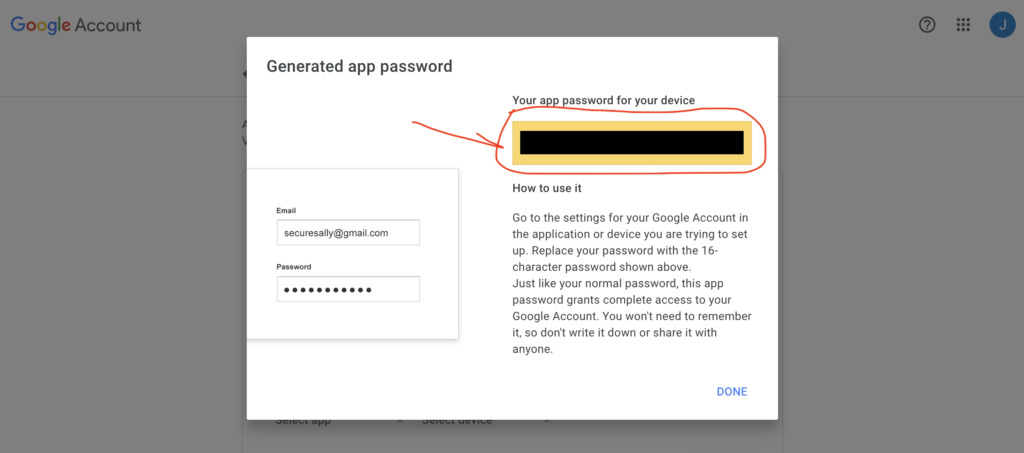
Step 8: Copy and paste your app password to Press Jockey
This is your private app password for Press Jockey.
Do not share this with anyone else.
You will need to copy and paste your app password into your Press Jockey account in order to fully monitor and manage your press and expert requests.