Step 1: Enable Automatic Forwarding
Go to Yahoo Mail’s homepage and log into your account.
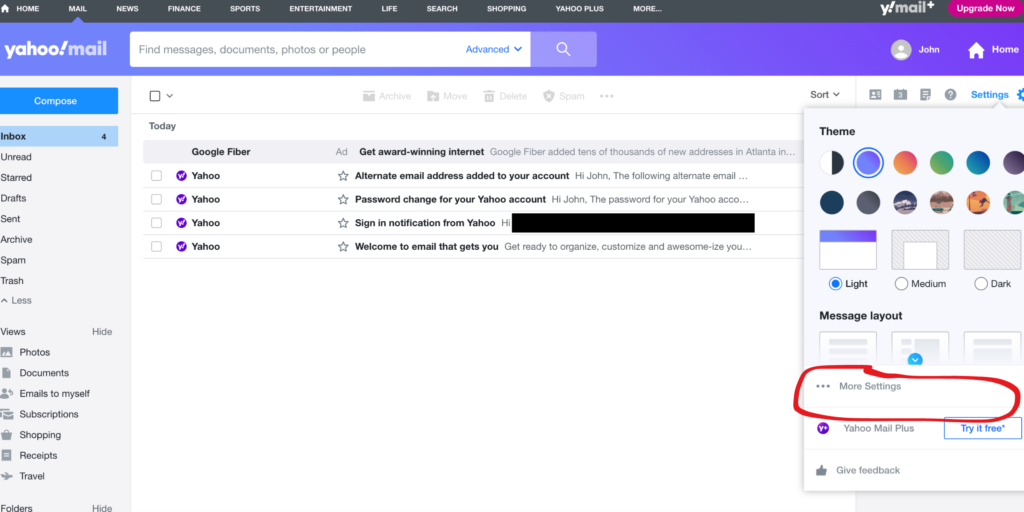
2. Click on the gear icon in the upper right corner of the screen to open the ‘Settings’ menu.
It will look like this:

3. Select ‘More Settings’
You’ll find it here:
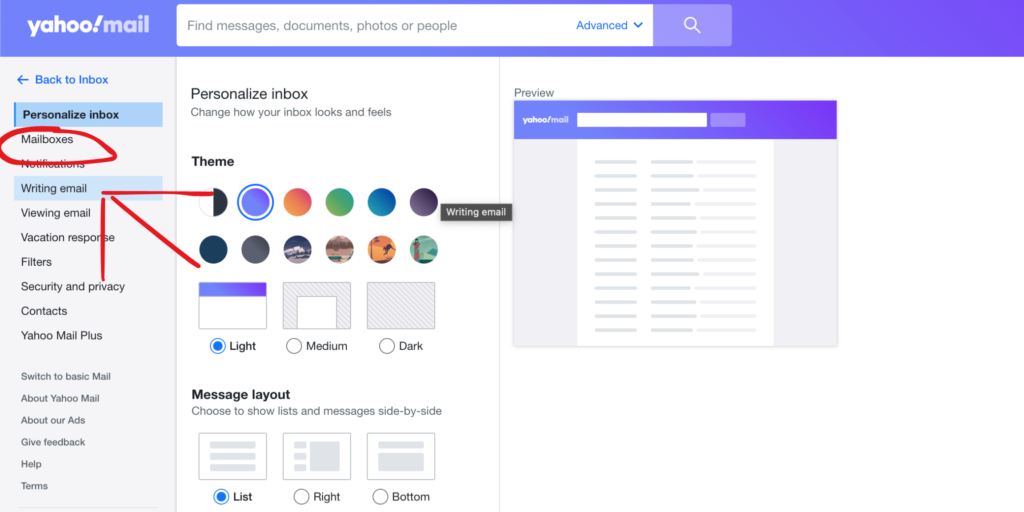
4. Click on ‘Mailboxes’ on the left sidebar.
You can see it here:
5. Select the Yahoo email account you want to forward from.
This should be the email account where you get your expert requests from platforms like HARO, Qwoted, etc.
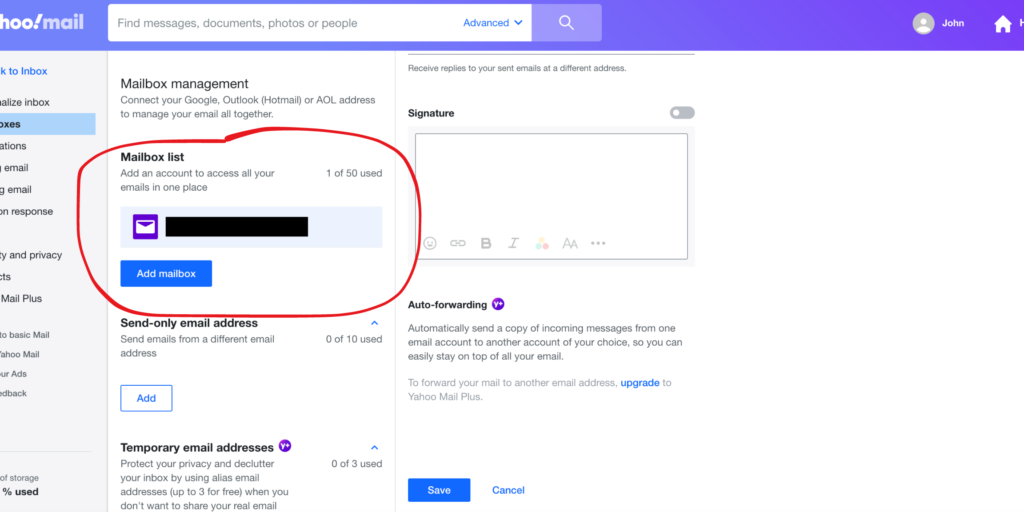
7. Enter the email address where you want your emails forwarded to.
This will be the Press Jockey email address.
Click ‘Verify’.
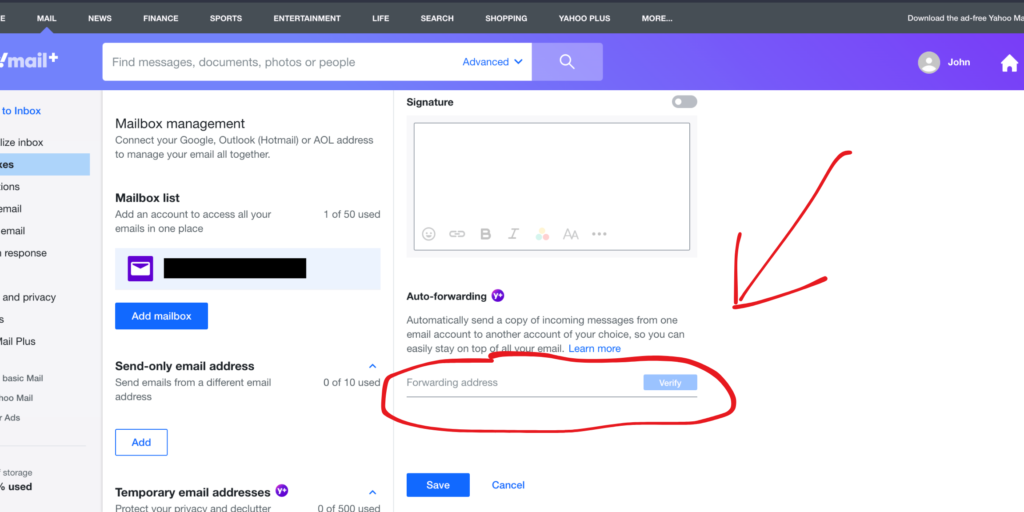
Press Jockey will find your verification email from Yahoo!, and we will verify that you want to forward select emails to your account. You will get a notification once complete.
Once complete, you will be able to successfully forward your expert request emails to Press Jockey.
PART 2: Setting Up Forwarding Filters
In this section we will setup filters for the various platforms that you are getting expert requests from. For example, if you are getting expert requests from HARO, Qwoted, or others – you will need to set up an individual forwarding filter for each. Here’s how to do it:
1. Go back to the main Yahoo Mail page and click the ‘Settings’ gear icon again.
You’ll find it in the top right corner here:
2. Click the ‘More Settings’ button.
You can find it here:
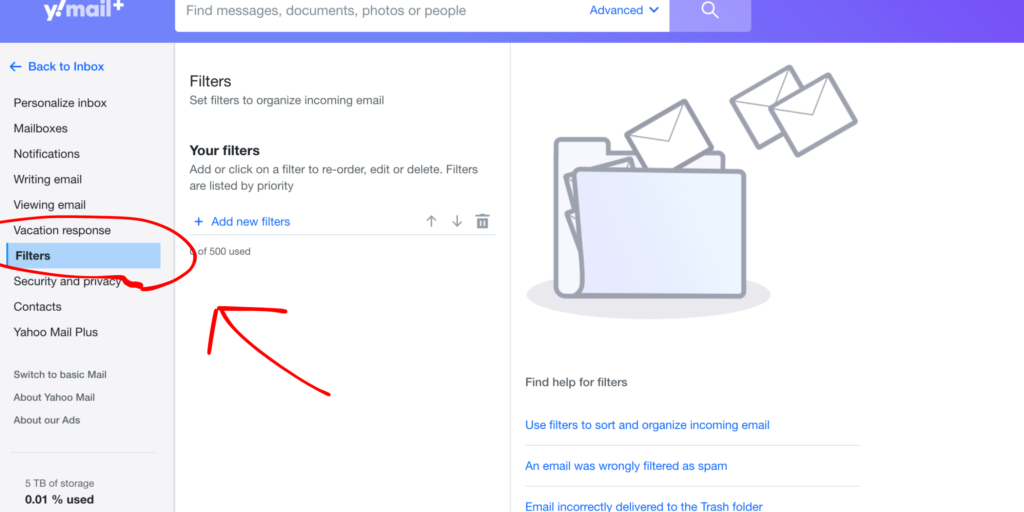
3. Click on the ‘Filters’ button on the left sidebar.
You’ll see it here:
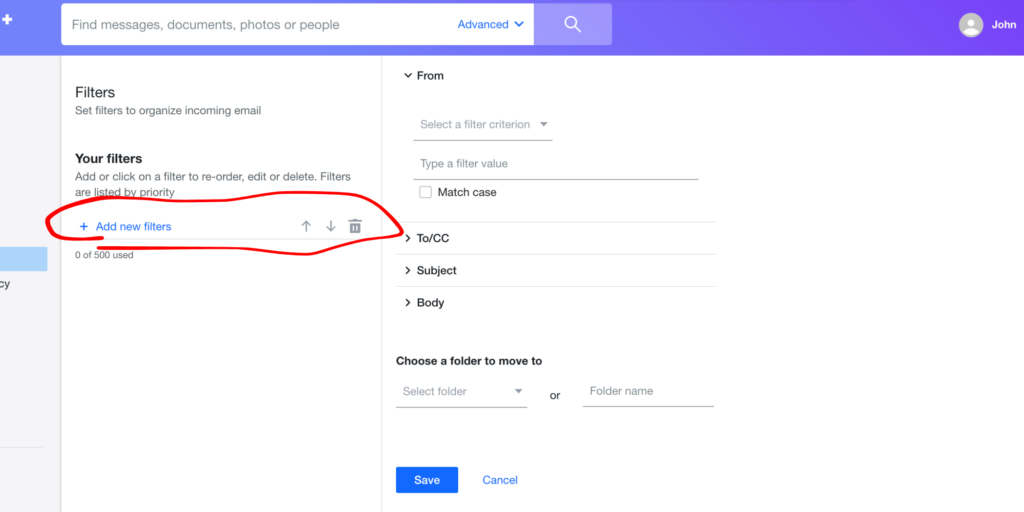
4. Click “Add new filters” to create a new filter.
You’ll see it here:
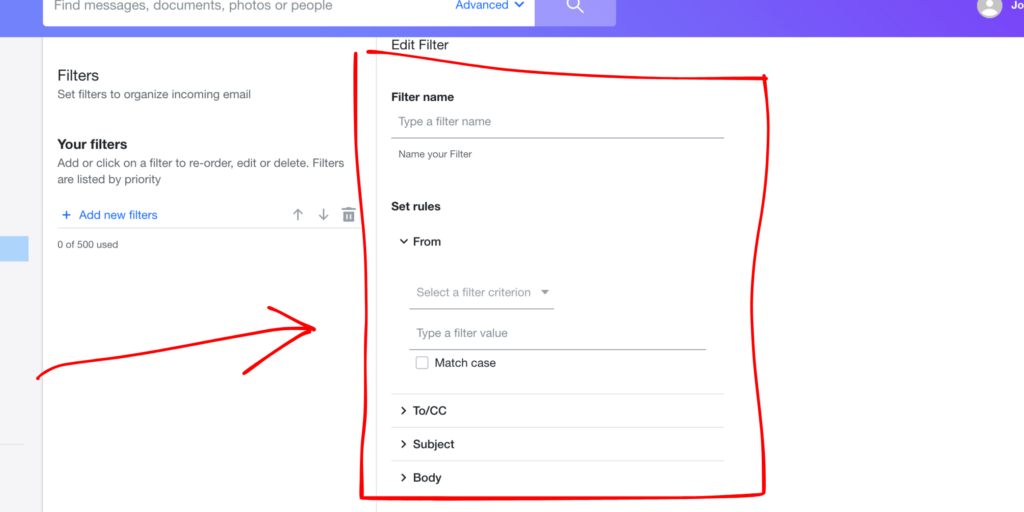
5. Fill in the details for the filter (this will include the platform name where you get your expert requests, eg. “HARO”)
You can specify the filter name, sender, recipient, subject, and whether the email contains or does not contain specific words.
You will want to select “email contains” and then enter the name of the platform that you get requests from – eg. Email contains “HARO”.
7. In the ‘Then move messages to this folder’ section, select ‘Inbox’ to ensure correct filtering
This will ensure your emails are forwarded to Press Jockey, but are also in your Inbox

6. Click ‘Save’.
And you’ve created your first forward to Press Jockey!