Here are the other “how to guides” you might need to check-out in order to get your Gmail account connected to Press Jockey:
Gmail admin: How admins can setup 2-step authentication for your Gmail powered domain
Gmail users: How you can connect your Gmail account to Press Jockey
Please note: This step is NEEDED to activate the most powerful features of Press Jockey. We want to make sure your account is secure and you are strapped in for success!
Here’s how you can turn on 2-factor authentication for your account.
IMPORTANT:
IF you are a part of a larger organization, or if you are using a company email account, you may need administrator access to activate your company’s email settings. Your administrator will need to turn on a setting that allows individuals on the company email to turn “ON” 2-factor authentication themselves. They can use this article to do that.
Why? Sometimes the settings for 2-factor authentication are set to “OFF” for an entire company’s email system. If this is the case, you will not be able to turn on your 2-factor settings, as the entire company has been restricted.
Only your admin can unlock this, and allow individual users to setup their own 2-factor authentication.
Don’t worry. It’s straightforward and just requires a few steps. If you want us to walk you through it click here to book an appointment.
Let’s continue.
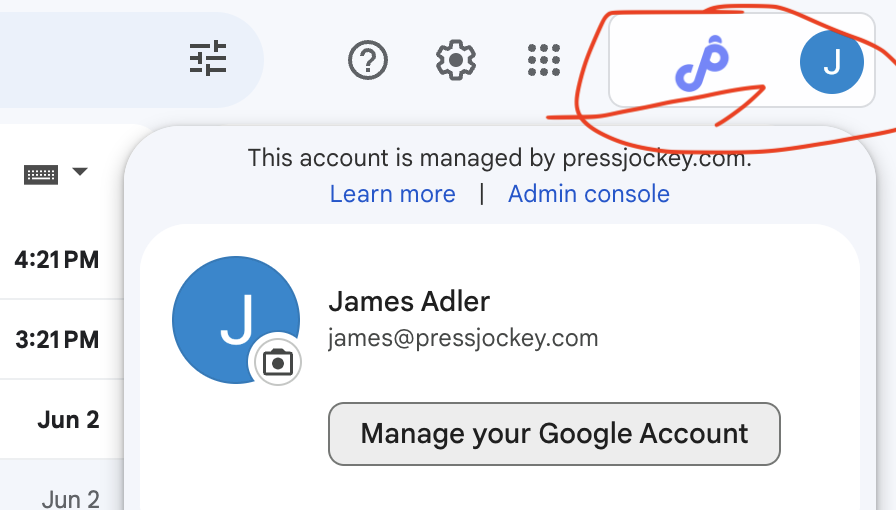
Step 1: Open your account settings (in Gmail)
Click on the top right corner of your Gmail screen, where you see your initial(s). It looks like this:
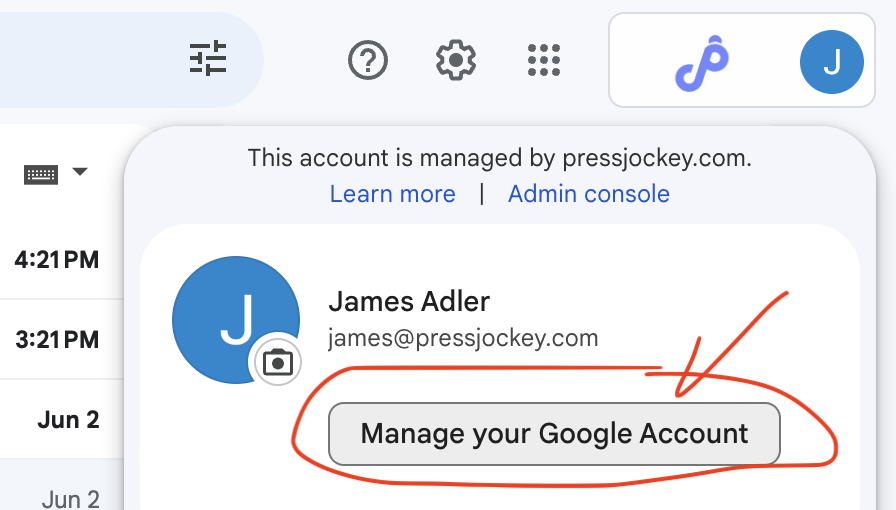
Step 2: Click on “Manage your Google Account”
It looks like this:
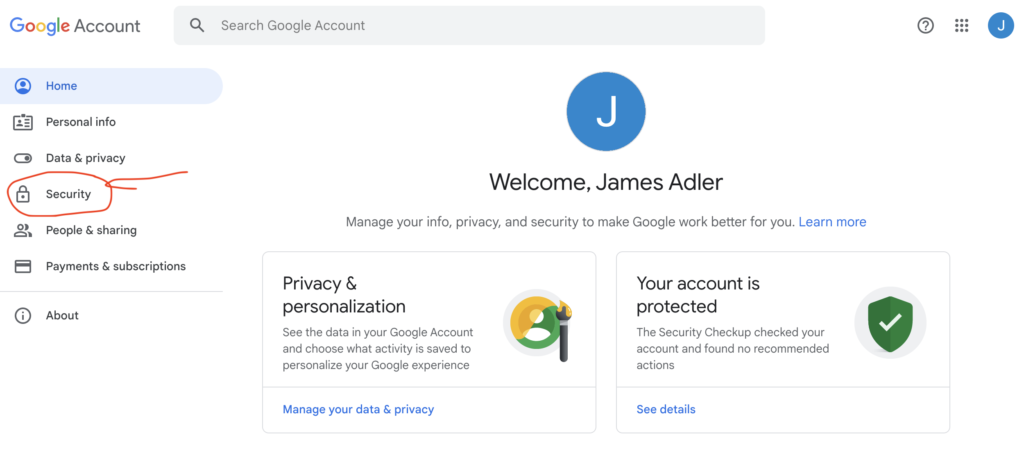
Step 3: Click on Security
It looks like this:
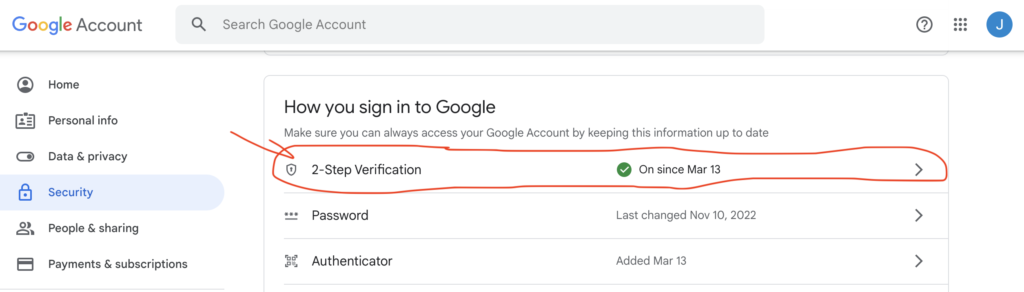
Step 4: Click on 2-step verification
It looks like this:
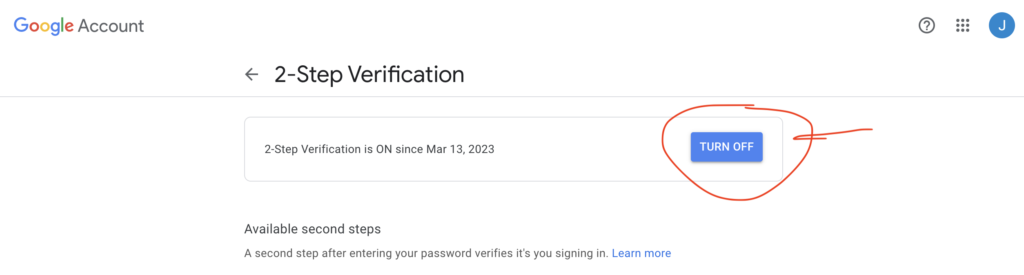
Step 5: Click on TURN ON
It looks like this:
Congrats! Now you’ve set up 2-step verification!
Now you can really unlock the power of Press Jockey by using an application password to connect your account to Press Jockey.
Want to explore Google’s instructions on how to do this? You can do that here.